Last Updated on 26th December 2023
Cracked chimneys can pose a serious threat to the structural integrity and safety of a building. In this article, we will guide you through the process of repairing a cracked chimney, ensuring a durable and long-lasting solution. From assessing the damage to applying the necessary repair solution, we will provide step-by-step instructions to help you complete this task with professionalism and precision. By following these guidelines, you can restore the functionality and safety of your chimney in no time.
Assessing the Damage
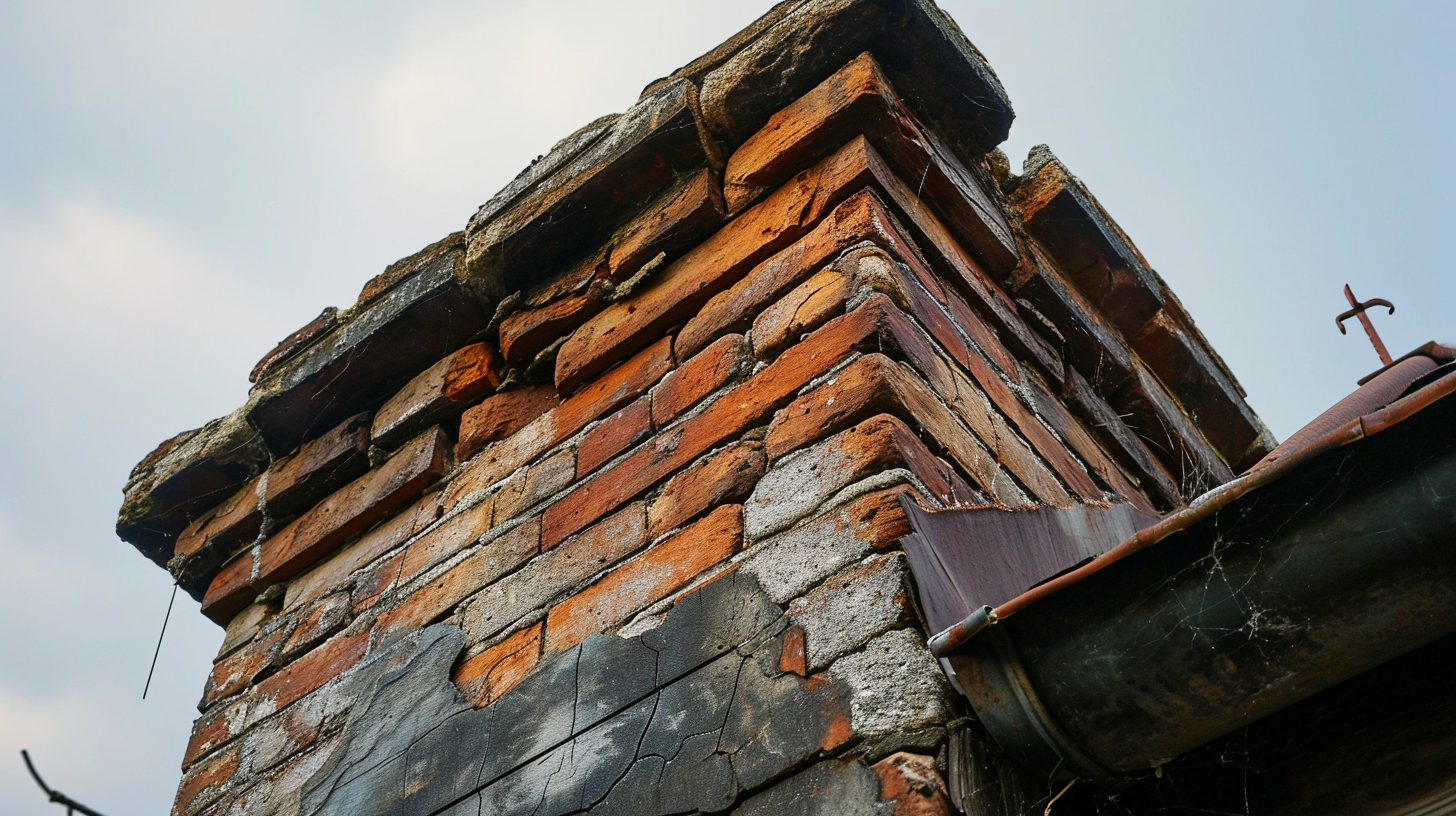
Before proceeding with any repairs, it is crucial to thoroughly assess the damage to the chimney. Evaluating the severity of the damage is important to determine the appropriate course of action. Cracks in the chimney can occur due to various potential causes, such as weathering, structural issues, or settling of the foundation. To evaluate the severity, a visual inspection of the chimney should be conducted, looking for any visible cracks or signs of deterioration. Additionally, a professional chimney inspector may use specialized tools, like a chimney camera, to assess the internal condition of the chimney. This evaluation will help determine the extent of the damage and whether it requires minor repairs or a complete chimney rebuild. Properly assessing the damage is essential to ensure an effective and long-lasting repair solution.
Gathering the Necessary Tools and Materials
Before starting the repair process, it is crucial to gather all the necessary tools and materials. Essential tools for repairing a cracked chimney may include a trowel, wire brush, masonry chisel, and safety gear such as gloves and goggles. Additionally, choosing the right materials, such as high-quality mortar and sealant, is essential for ensuring a long-lasting and effective repair.
Essential Tools for Repair
To effectively repair a cracked chimney, it is crucial to gather the necessary tools and materials, such as a trowel, mortar mix, and a wire brush, before beginning the repair process. However, it is equally important to have a clear understanding of the essential tools required for the repair. These tools include a masonry hammer, chisel, masonry saw, safety goggles, and gloves. The masonry hammer and chisel are essential for removing loose mortar and damaged bricks, while the masonry saw is used to cut new bricks to the desired size. Safety goggles and gloves are necessary to protect the eyes and hands from any potential hazards during the repair. By having these tools on hand, homeowners can ensure that their chimney repair is done safely and effectively. Additionally, it is important to follow proper repair techniques and safety precautions, such as wearing a dust mask and working in well-ventilated areas, to prevent any health risks associated with the repair process.
Choosing the Right Materials
The selection of the appropriate materials is crucial when it comes to repairing a cracked chimney and ensuring a successful and long-lasting repair. There are various repair techniques available, but without the right materials, the effectiveness of these techniques can be compromised. Common mistakes in choosing materials for chimney repair include using low-quality sealants or adhesives that may not withstand the extreme temperatures and weather conditions. It is important to use materials specifically designed for chimney repairs, such as heat-resistant mortars and sealants. These materials are specially formulated to withstand the high temperatures and provide a durable and secure repair. Additionally, choosing the right materials can help prevent further damage and reduce the need for frequent repairs. Therefore, it is essential to carefully select the appropriate materials to ensure a successful chimney repair.
Preparing the Chimney for Repair
During the initial inspection of the chimney, it is crucial to thoroughly assess the extent of damage and devise a comprehensive plan for preparing the chimney for repair. A thorough chimney inspection involves checking for cracks, loose bricks, and any signs of water damage. Once the inspection is complete, the next step is to seal the chimney to prevent further damage. Chimney sealing involves applying a waterproof sealant to the exterior of the chimney to prevent water penetration. This not only helps to protect the chimney from water damage but also helps to extend its lifespan. Additionally, chimney sealing can also help to improve the energy efficiency of the home by preventing drafts and heat loss. Therefore, it is important to properly inspect and seal the chimney before proceeding with any repairs.
Applying the Repair Solution
To successfully repair a cracked chimney, it is crucial to choose the right repair solution that matches the type and severity of the damage. Once the appropriate solution is selected, proper application techniques should be followed to ensure a thorough and effective repair. After applying the repair solution, allowing ample time for drying and curing is essential for the repair to be fully effective and long-lasting.
Choosing the Right Solution
In order to effectively address the issue of a cracked chimney, it is crucial to carefully consider and evaluate the available repair solutions. When it comes to repairing a cracked chimney, there are several repair methods to choose from. One common method is chimney repointing, which involves removing the damaged mortar joints and replacing them with new mortar. Another option is chimney rebuilding, which entails completely dismantling the chimney and rebuilding it from scratch. Both methods have their own advantages and disadvantages, and the choice ultimately depends on the severity of the crack and the budget considerations. Repointing is generally less expensive and less time-consuming compared to rebuilding. However, if the crack is extensive or if the chimney is structurally compromised, rebuilding may be the more suitable solution, despite its higher cost.
Proper Application Techniques
The proper application techniques for repairing a cracked chimney involve carefully following the manufacturer’s instructions and ensuring a thorough and even coverage of the repair solution. When it comes to repairing techniques, it is important to start by thoroughly cleaning the cracked area, removing any loose debris and dirt. Next, the repair solution should be mixed according to the manufacturer’s instructions, ensuring the correct ratio of components. The solution should then be applied to the cracked area using a trowel or brush, making sure to spread it evenly and fill in all the cracks. It is important to troubleshoot common issues such as air bubbles or uneven coverage by using a roller or squeegee to smooth out the repair solution. Finally, the repaired chimney should be allowed to cure for the specified amount of time before being used again. Following these proper application techniques will ensure a successful and long-lasting repair.
Drying and Curing Process
How long does the drying and curing process take, and should any additional steps be taken to ensure a proper application of the repair solution? When repairing a cracked chimney, it is crucial to allow sufficient time for the repair solution to dry and cure effectively. The drying and curing process typically depends on several factors, such as the type of repair solution used, temperature, and humidity levels. In general, it can take anywhere from a few hours to a few days for the solution to fully dry and cure. To ensure a proper application, it is essential to follow the manufacturer’s instructions and recommendations. Additionally, steps should be taken to prevent moisture from penetrating the repaired area, such as ensuring effective sealing of the repaired chimney. This can be achieved through the use of appropriate sealants and regular maintenance to address any potential sources of moisture.
Curing and Finishing the Repair
Applying a sufficient amount of sealant is crucial for ensuring the effective curing and finishing of the chimney repair. Finishing techniques play a significant role in preventing discoloration and maintaining the aesthetic appeal of the repaired chimney. Once the crack has been filled and the sealant applied, it is important to use appropriate finishing techniques to ensure a smooth and uniform appearance. One common technique is to use a trowel to smooth out the sealant, ensuring that it blends seamlessly with the surrounding surface. This helps to prevent any noticeable differences in texture or color. Additionally, applying a coat of paint or stain can further enhance the appearance and provide added protection against discoloration caused by weathering or exposure to elements. Proper curing and finishing of the chimney repair are essential for not only ensuring its structural integrity but also for maintaining its visual appeal.
Maintaining and Preventing Future Cracks
To effectively prevent future cracks in the chimney, regular inspection and maintenance of the mortar joints are essential. Chimneys are exposed to various weather conditions, including rain and snow, which can lead to water damage and deterioration of the mortar joints. Regular inspections allow homeowners to identify any cracks or gaps in the mortar and address them before they become major issues. Additionally, regularly inspecting the chimney can help prevent water damage. Water can seep into cracks in the mortar, freeze, and expand, causing further damage. By conducting regular inspections and promptly repairing any cracks or gaps, homeowners can prevent water from entering the chimney and causing costly repairs. Therefore, it is of utmost importance to prioritize regular inspections and maintenance to ensure the longevity and functionality of the chimney.


