Last Updated on 26th December 2023
Are you facing the challenge of repairing a cracked plaster wall? This comprehensive guide provides step-by-step instructions on assessing the cracks, gathering the necessary tools, preparing the wall surface, and applying plaster patching compound. With techniques for smoothing, sanding, priming, and painting the repaired area, you will achieve a seamless finish. Additionally, discover essential maintenance tips to ensure the longevity of your newly repaired plaster wall.
Assessing the Cracks
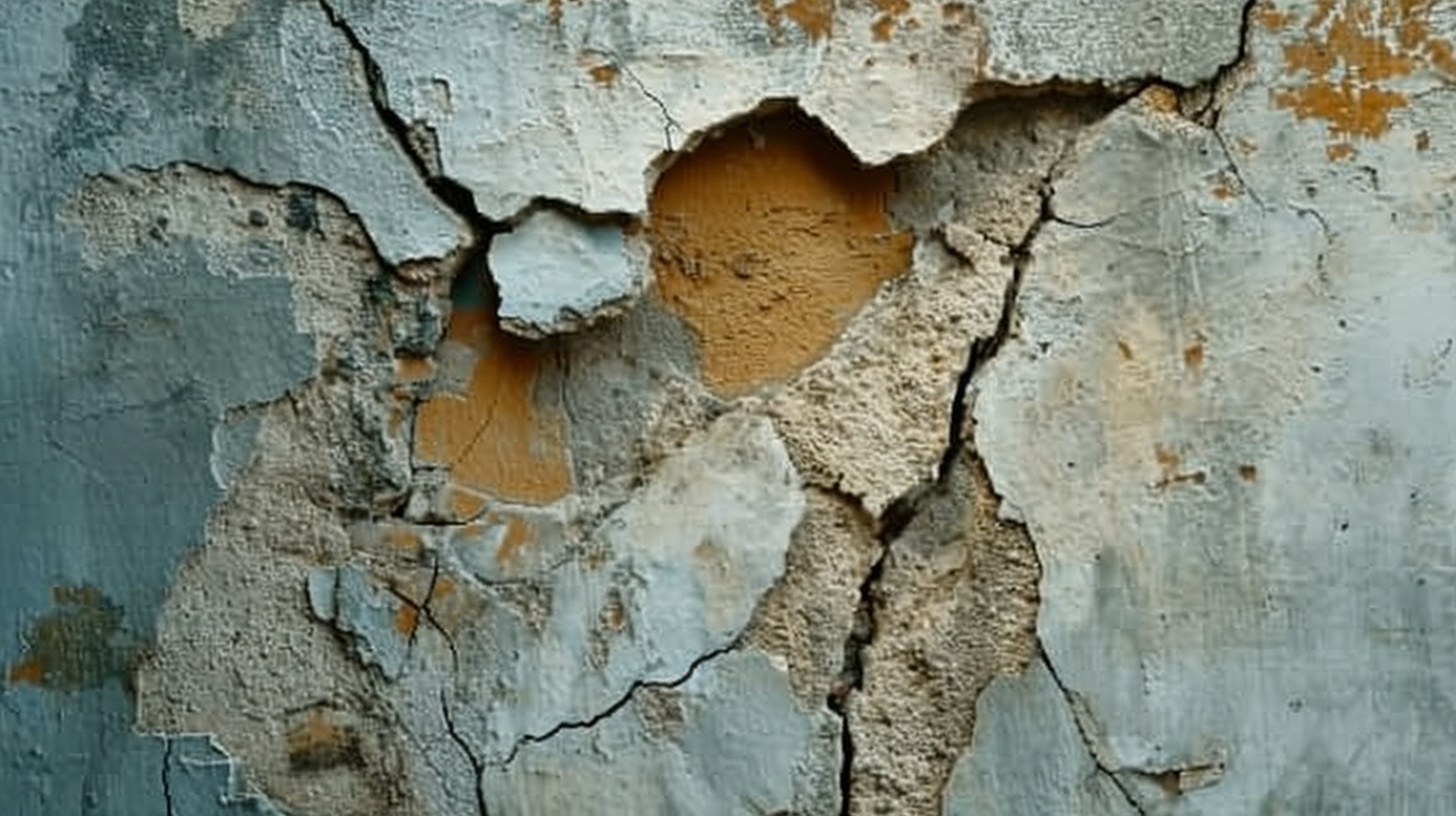
During the process of assessing the cracks in the plaster wall, it is crucial to thoroughly examine both the size and the depth of each individual fracture. By evaluating the size, one can determine the extent of the repair needed and the appropriate repair techniques to be employed. Larger cracks may require more extensive measures such as filling with joint compound or using mesh tape for added support. On the other hand, smaller cracks can often be repaired with a simple patching compound. Additionally, it is important to identify the common causes of the cracks, such as settling, moisture damage, or structural issues. This knowledge will help in addressing the root cause of the problem and preventing future cracks from occurring.
Gathering the Necessary Tools
Before starting the repair process, it is important to gather all the necessary tools. Essential tools for repairing a cracked plaster wall include a putty knife, sandpaper, joint compound, a trowel, and a paintbrush. Choosing the right equipment is crucial for achieving a successful and long-lasting repair.
Essential Tools for Repair
Utilizing a comprehensive toolkit equipped with essential tools such as a putty knife, sandpaper, and joint compound is crucial for effectively repairing a cracked plaster wall. However, before diving into the repair process, it is important to take essential safety precautions to ensure the well-being of both the individual performing the repair and the surrounding environment. This includes wearing protective gear such as gloves, goggles, and a dust mask to minimize exposure to harmful dust particles. Additionally, techniques for repairing large cracks differ slightly from those used for smaller cracks. For larger cracks, it is recommended to widen the crack with a utility knife and then apply multiple layers of joint compound, allowing each layer to dry completely before applying the next. This helps to ensure a strong and seamless repair that will withstand the test of time.
Choosing the Right Equipment
Selecting the appropriate equipment, such as a putty knife, sandpaper, and joint compound, is paramount for successfully repairing a cracked plaster wall. However, choosing the right materials goes beyond just having the necessary tools. It also involves understanding the proper technique for repairing plaster walls. When it comes to materials, it is crucial to use the right type of joint compound that is specifically designed for plaster repairs. This compound is typically stronger and more adhesive than regular wall joint compound. Additionally, it is important to choose the right sandpaper grit to ensure a smooth and even finish. Proper technique for repairing plaster walls involves carefully removing any loose or damaged plaster, applying the joint compound evenly, and feathering the edges to blend with the surrounding wall. By selecting the right materials and using the proper technique, you can achieve a professional-looking repair on your cracked plaster wall.
Preparing the Wall Surface
Before beginning the repair process, it is important to properly prepare the wall surface. This involves cleaning the surface to remove any dirt or debris that may interfere with the repair, filling the cracks with a suitable filler, and then smoothing the plaster to ensure a seamless finish. By taking the time to prepare the wall surface thoroughly, you can ensure a successful and long-lasting repair.
Cleaning the Surface
To ensure a thorough cleaning, it is advisable to use a mild detergent and a clean cloth to remove any dirt or dust particles from the plaster wall surface. Surface preparation is a crucial step in repairing a cracked plaster wall, and cleaning the surface is the first step in this process. Before applying any repair materials, it is important to remove any loose debris or contaminants from the surface. This can be done by gently scrubbing the wall with a mixture of mild detergent and water using a clean cloth. Pay special attention to any areas with visible dirt or stains. Cleaning techniques such as wiping in a circular motion can help ensure an even and thorough cleaning of the plaster wall surface. Once the surface is clean, it can be properly prepared for the next steps in the repair process.
Filling the Cracks
During the process of filling the cracks in the plaster wall, it is essential to carefully assess the depth and width of each crack in order to determine the appropriate amount of filler and ensure a seamless repair. Common causes of plaster wall cracks can include settling of the foundation, temperature changes, or moisture buildup. To prevent future cracks, it is important to address any underlying issues, such as repairing leaks or improving ventilation. Different types of plaster wall cracks can indicate different causes. For example, hairline cracks are often caused by normal settling, while larger cracks may be a sign of structural issues. By understanding the causes and types of plaster wall cracks, homeowners can take appropriate measures to prevent them and ensure a long-lasting repair.
Smoothing the Plaster
After applying the plaster mixture, the next step in the process involves carefully smoothing the plaster with a trowel to achieve a level and even wall surface. Proper ventilation is of utmost importance during plaster repair to ensure a safe and healthy environment. When working with plaster, it is essential to have good airflow in the room to prevent the buildup of dust and fumes. This can be achieved by opening windows or using fans to circulate the air. Additionally, techniques for achieving a smooth finish on repaired plaster walls involve using a trowel to gently scrape away any excess plaster and create a flush surface. It is important to work in small sections and apply even pressure to avoid creating uneven areas. The final result should be a seamless and flawless wall that blends in with the existing plaster.
Applying Plaster Patching Compound
While applying plaster patching compound, it is important to ensure a smooth and even application for a seamless repair of the cracked plaster wall. When discussing patching techniques, it is essential to consider the proper preparation of the surface. Before applying the patching compound, remove any loose plaster and clean the area thoroughly. This will ensure better adhesion and a more durable repair. Additionally, it is crucial to choose the right type of plaster patching compound for the job. Different compounds have different drying times and consistencies, so selecting the appropriate one will help achieve the desired results. Troubleshooting common issues during the patching process can also be a valuable discussion idea. These may include issues such as air bubbles, uneven drying, or difficulty in achieving a smooth finish. By addressing these topics, professionals can share their experiences and provide useful tips for successful plaster wall repairs.
Smoothing and Sanding the Patched Area
How can professionals achieve a seamless finish when smoothing and sanding the patched area of a cracked plaster wall? To achieve a smooth and seamless finish when repairing a cracked plaster wall, professionals employ various sanding techniques and ensure sufficient drying time for the patching compound. The first step is to allow the patching compound to fully dry according to the manufacturer’s instructions. Once dry, professionals use a fine-grit sandpaper or sanding block to gently sand the patched area. This is done in a circular motion to avoid creating noticeable lines or uneven surfaces. It is important to periodically check the smoothness of the surface by running a hand over it. If needed, additional layers of patching compound may be applied and sanded until the desired smoothness is achieved. Patience and attention to detail are key to achieving a flawless finish.
Priming the Wall
The primer should be applied evenly to the wall, ensuring complete coverage before proceeding with any further steps. When it comes to painting techniques, priming is a crucial step in achieving a smooth and flawless finish. Not only does it create a uniform surface, but it also helps the paint adhere better and prevents the paint from being absorbed unevenly by the wall.
To apply the primer, start by using a brush to cut in along the edges and corners of the wall. Then, use a roller to cover the larger areas. It’s important to follow the manufacturer’s instructions regarding drying time between coats. This allows the primer to fully dry and create a solid base for the paint. Typically, primers require at least 2 hours of drying time before applying paint. However, it’s always best to check the label for specific instructions. Taking the time to properly prime the wall will ultimately result in a professional-looking paint job.
Painting and Blending the Repaired Area
Can you explain the proper technique for painting and blending the repaired area? When it comes to repairing a cracked plaster wall, painting and blending the repaired area is essential to achieve a seamless finish. Blending techniques play a crucial role in ensuring that the repaired area seamlessly merges with the rest of the wall. The first step is to ensure a proper color match. This can be done by taking a sample of the existing wall color and matching it at a paint store. Once you have the matching paint, start by applying a primer to the repaired area to create an even surface. Then, using a brush or roller, carefully apply the paint in thin, even coats, feathering it out towards the surrounding area. This will help to blend the repaired area with the rest of the wall, resulting in a smooth and flawless finish.
Finishing Touches and Maintenance Tips
To ensure a long-lasting and polished result, regularly dusting and wiping down the repaired area is essential. In addition to these maintenance techniques, there are other steps you can take to prevent future cracks in your plaster wall. One important aspect is to monitor the humidity levels in your home, as excessive moisture can weaken the plaster and lead to cracks. Using a dehumidifier or ventilation fans in areas prone to moisture, such as bathrooms and kitchens, can help maintain optimal humidity levels. Another preventive measure is to avoid hanging heavy objects directly on the plaster wall. Instead, use anchors or hooks that distribute the weight evenly and minimize stress on the plaster. By following these maintenance tips and taking preventive measures, you can ensure that your repaired plaster wall remains in good condition for years to come.
