Last Updated on 26th December 2023
In this informative article, we will guide you through the process of repairing a leaking roof vent. A leaking roof vent can lead to water damage and costly repairs if not addressed promptly. By following our step-by-step instructions, you will learn how to assess the damage, gather the necessary tools and materials, remove the damaged vent, clean and prepare the area, install a new vent, and conduct thorough testing to ensure a leak-free solution.
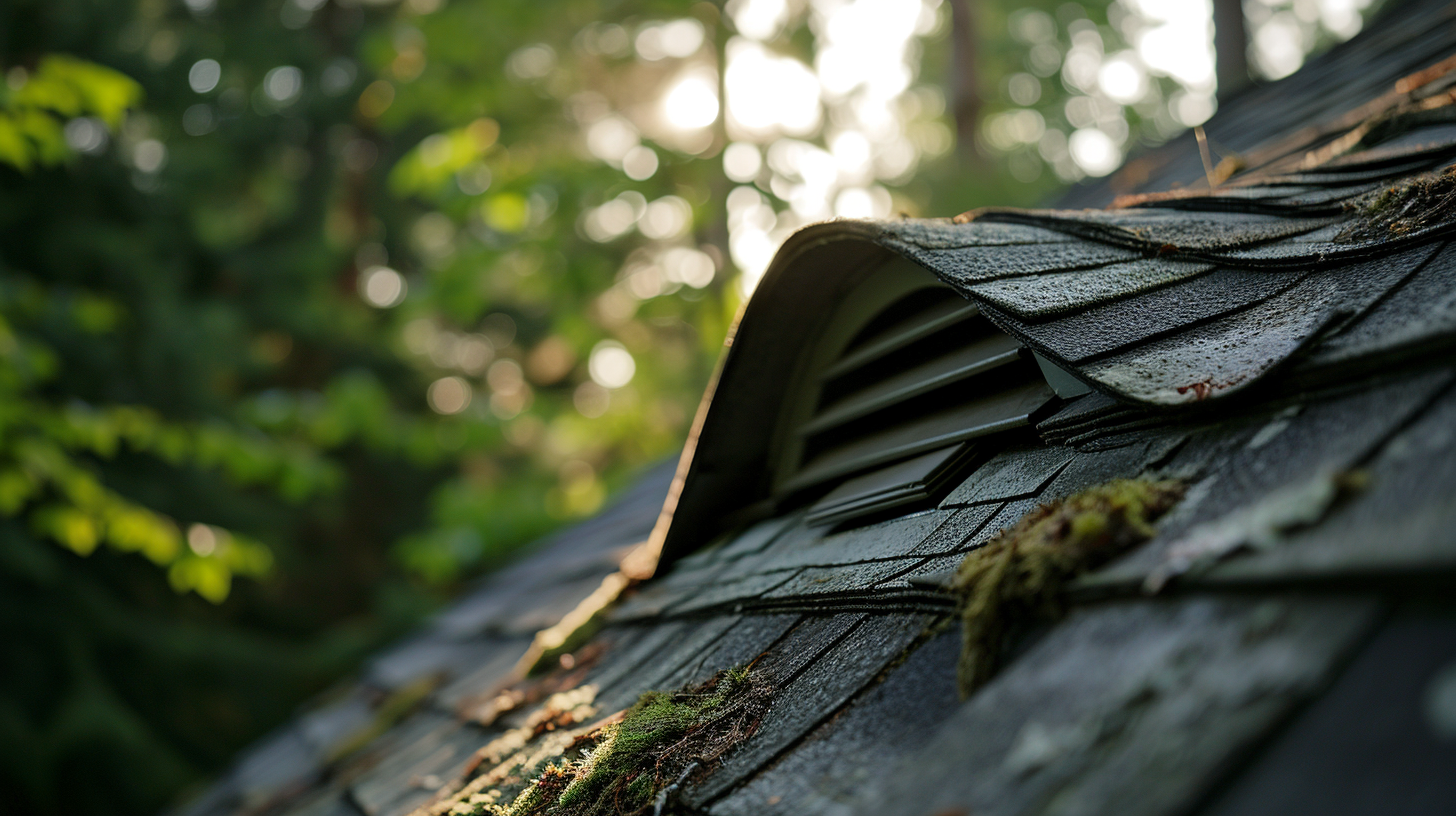
Assessing the Damage
In order to accurately determine the extent of the damage, a thorough assessment of the roof vent is necessary. Evaluating the extent of the damage is crucial to effectively repair a leaking roof vent. Start by inspecting the vent for any signs of cracks, gaps, or loose fittings. Check if the flashing around the vent is intact and properly sealed. Look for any water stains or discoloration on the ceiling or walls surrounding the vent. Additionally, check the attic for any signs of water intrusion or moisture damage. Once the assessment is complete, you can then proceed to finding alternative solutions to fix the leaking roof vent. This may involve replacing damaged components, applying sealant or caulking, or even considering a complete vent replacement if necessary.
Gathering the Necessary Tools and Materials
To successfully repair a leaking roof vent, it is essential to gather the necessary tools and materials required for the task. Common causes of roof vent leaks include damaged or deteriorated flashing, cracked vent pipes, and improper installation. To prevent roof vent leaks, regular maintenance is crucial. Inspecting the roof vents for any signs of damage or wear, such as cracks or loose seals, can help identify potential issues before they become major leaks. Additionally, ensuring proper installation of roof vents with the appropriate flashing and sealant can prevent water from seeping in. Finally, keeping the surrounding area clear of debris, such as leaves and branches, can help prevent clogs and blockages that may contribute to leaks. By following these tips, homeowners can minimize the risk of roof vent leaks and maintain a watertight roof.
Removing the Damaged Roof Vent
The removal of the damaged roof vent requires careful assessment of its condition and the use of appropriate tools. Before proceeding with the repair process, it is important to determine whether the roof vent can be salvaged or if a roof vent replacement is necessary. A thorough inspection should be conducted to identify any signs of damage or deterioration such as cracks, leaks, or a loose fit. If the roof vent is beyond repair, it should be safely removed to make way for a new one. This process typically involves unscrewing or prying off the vent from the roof, taking care not to cause any further damage to the surrounding area. Once the damaged vent is successfully removed, the next step is to install a new roof vent to ensure proper ventilation and prevent future leaks.
Cleaning and Preparing the Area
After removing the damaged roof vent, thorough cleaning and precise preparation of the area are essential to ensure proper adhesion and installation of the new vent. Cleaning the area involves removing any debris, dirt, or dust that may hinder the adhesion process. This can be done using a broom or a vacuum cleaner. Once the area is clean, it should be inspected for any signs of damage or deterioration that may have caused the vent to leak in the first place. Common causes of roof vent leaks include cracked seals, damaged flashing, and worn-out gaskets. Addressing these issues during the preparation phase is crucial for preventing future leaks. By thoroughly cleaning and preparing the area, homeowners can ensure a successful installation of the new roof vent and minimize the risk of leaks in the future.
Installing a New Roof Vent
Proper alignment of the roof vent’s flanges is essential for the successful installation and long-term functionality of the new vent. When it comes to installing a new roof vent, proper ventilation is crucial for maintaining a healthy and functional home. Without proper ventilation, moisture can build up in the attic, leading to mold, mildew, and potential structural damage. Common roof vent problems include leaks, improper installation, and insufficient airflow. Leaks can occur when the flanges of the vent are not aligned correctly, allowing water to seep in. Improper installation can result in gaps or cracks that compromise the vent’s effectiveness. Insufficient airflow can lead to poor ventilation, causing a buildup of heat and moisture in the attic. Therefore, it is essential to ensure proper alignment of the roof vent’s flanges to prevent these common problems and maintain proper ventilation in the home.
Testing and Checking for Leaks
To effectively address potential leaks, it is important to thoroughly test and check the roof vent for any signs of water seepage or damage. Identifying common causes is crucial in understanding how to repair a leaking roof vent. Some common causes include cracked or damaged vent pipes, worn out rubber seals, or improperly installed vents. In order to identify the source of the leak, it is recommended to conduct a water test by spraying water on the roof vent and checking for any signs of water entering the interior of the building. Once the leak is identified, there are a few tips for temporary fixes that can be used until a permanent solution is implemented. These include applying roofing sealant or using temporary patches such as tarps or duct tape to cover the damaged area. However, it is important to note that these fixes are temporary and professional repair or replacement of the roof vent is necessary for a long-term solution.